Frequently Asked Questions
How do I get CCS to work inside MPLAB® 8 IDE?
This FAQ will show how to create a simple project for the ex_sqw.c sample provided with the compiler. After you have success creating this project then you should not have problems creating projects with your own code.
- Make sure CCS is installed correctly on your PC. Try compiling an example program provided with the compiler to verify it works.
- Verify that MPLAB installed.
- If you haven't done so already, download and install the CCS MPLAB plugin
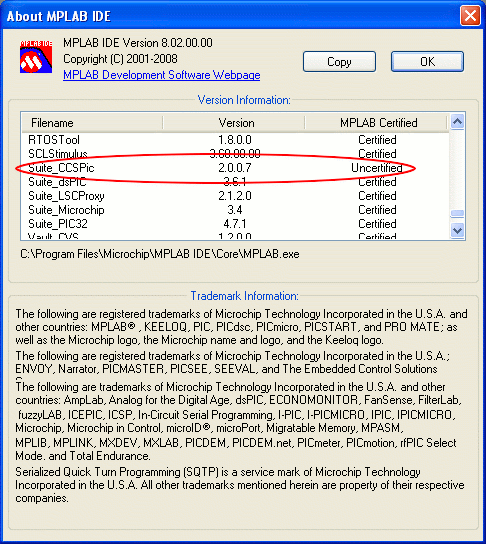
- Start MPLAB®, verify that the latest CCS Plug-in is installed in MPLAB by selecting Help->About MPLAB IDE...
This will open a dialog showing all the installed plug-ins. Look for a plug-in labeled Suite-CCSPIC. In the right column it will show the version of the plug-in, make sure it is the latest version (goto www.ccsinfo.com/downloads.php to verify the version CCS has available)
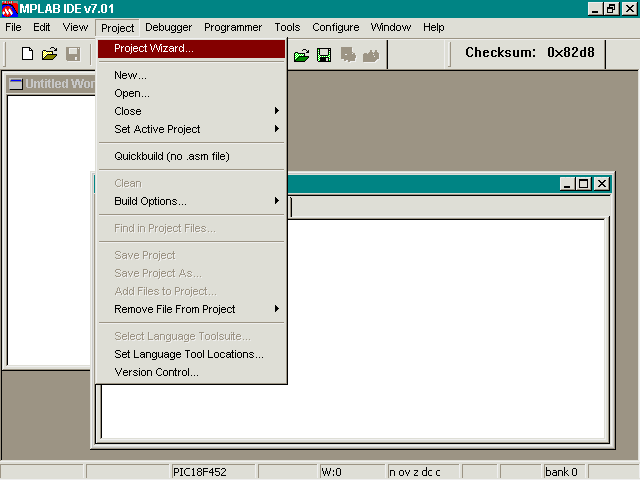
- Start MPLAB's Project Wizard by selecting Project->Project Wizard:
You will then be greeted with the Wizard splash screen: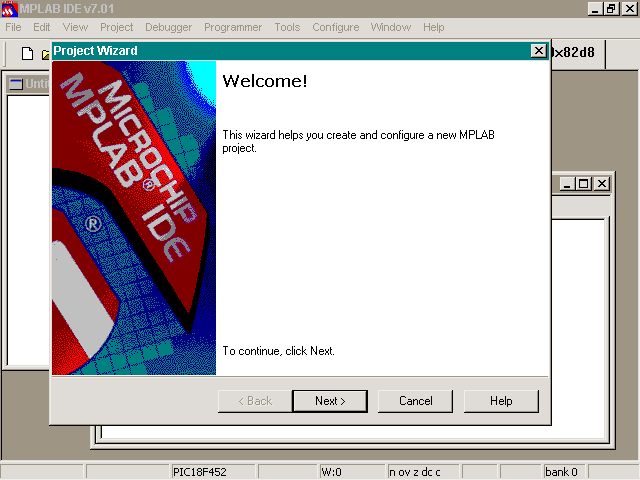
Press NEXT to continue - Select the device you wish to compile for and press NEXT to continue:
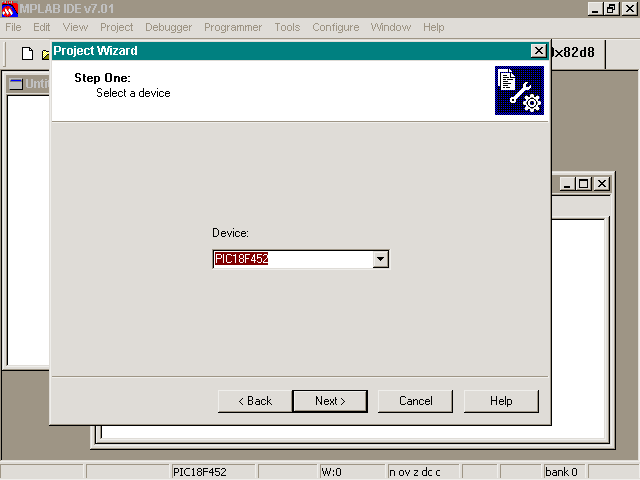
- The next screen of the wizard will ask you which build suite you wish
to use for your project. Select the tool suite labeled CCS C Compiler for PIC10/12/14/16/18/24/dsPIC30/dsPIC33.
If you do not see this option then the plug-in was not installed correctly.
Your tool-suite select screen should look like this: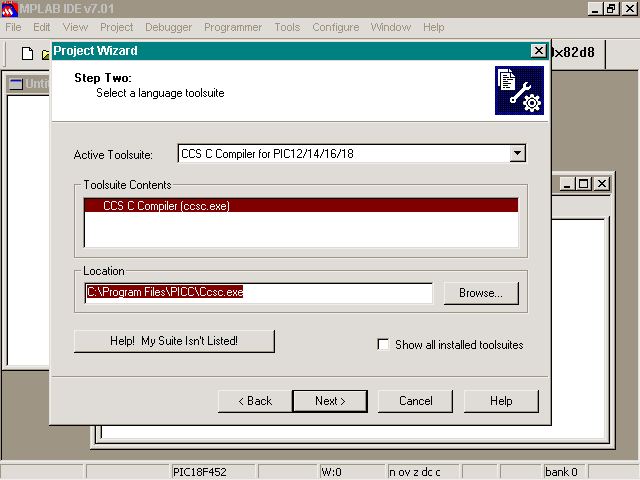
Verify the location field is where you installed the compiler. Press NEXT to continue. - The next step of the New Project Wizard will ask you what to call
the project and where to save the associated project files. Since we
are creating a project of ex_sqw.c then we shall call the Project Name ex_sqw
and save the project files to the examples folder C:\program files\picc\examples.
This is assuming you installed the compiler to the default location. If you installed it into a different location then please put that location there.
When done your screen should look like this: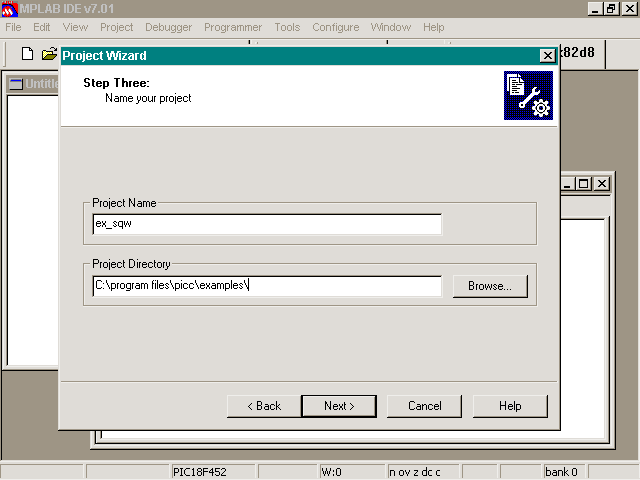
Press NEXT to continue - The next step of the New Project Wizard asks you what files you wish to
include with the project. This will be the .C file containing your main(), or the
.C file that you call from CCSC.EXE or PCW to compile. In our example this is
ex_sqw.c - so open C:\program files\picc\examples, highlight ex_sqw.c and press the
Add >> button.
When done your screen should look like this: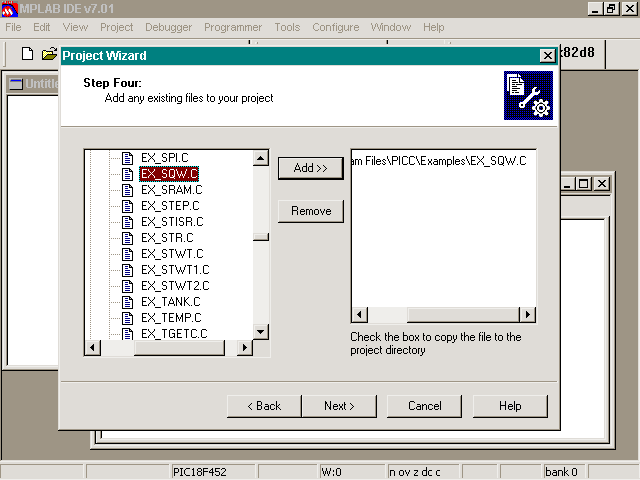
Press NEXT to continue - MPLAB Project Wizard will now give you a summary:
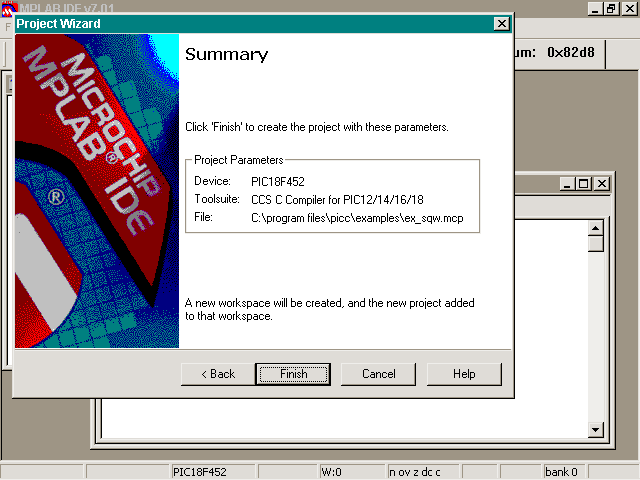
Press FINISH to continue - The Project Wizard will now close and MPLAB® will be back to normal mode.
In the Project Window on the left side you will see EX_SQW.C listed under Source Files.
Double-clicking on this file will open EX_SQW.C with the MPLAB Editor.
Your screen should look like this: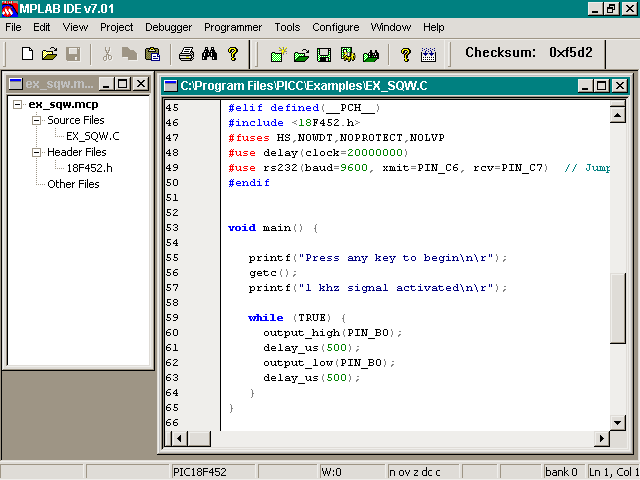
- Now that the project is completed, you can compile it by selecting Project->Compile:
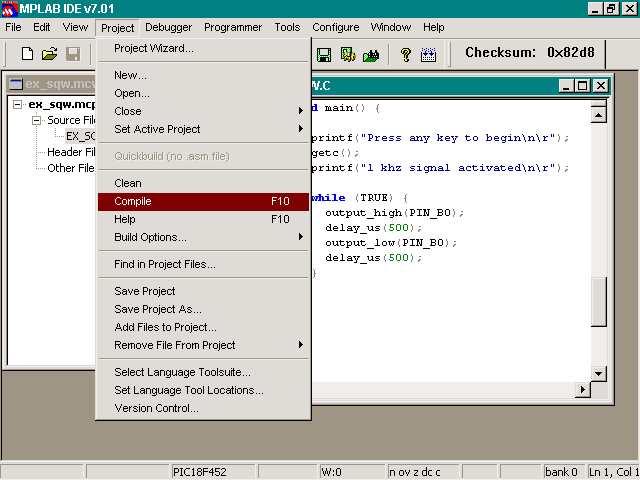
OR you could press F10 to compile your project. The output window will display results of the compile, and if successful it will say BUILD SUCCESSFULL: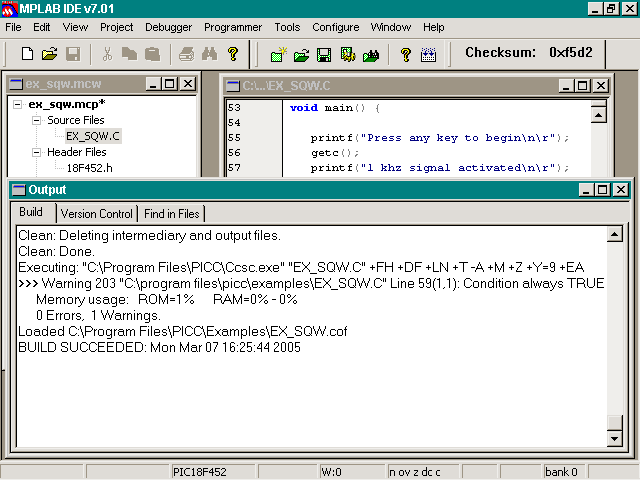
If there were any errors with your compile it would display the errors in the output window.
Some more tips
- If creating your own project, in Step 8 specify your own project name
(usually something descriptive to help you find your project) and specify
the directory where you want to save your own files. (If the directory doesn't exist
MPLAB® will create it.)
In Step 9 you can either use the Add >> button to include your files or you can skip that screen of the wizard and add your file later. To add your file later, right click on the Source Files of the Project Window and select Add Files. - If you add multiple .c files to the project, they will be compiled to .o files and then linked in the final stage. An already compiled .o file can be added to the project, and will be linked during the Make/Build process. If there is only one source in the project, it will be compiled and linked in one phase (no .o file will be created).
- Many project build options (such as output directory, include directories, output files generated, etc) can be changed by selecting "Project -> Build Options" from the MPLAB toolbar.
- If the compile fails with an error that says something like "Target chip not supported" or "Compiler not found" make sure that a.) you have the proper PIC selected (use "Configure -> Select Device" from the MPLAB toolbar), b.) the CCS C Toolsuite has been selected for this project (use "Project -> Set Language Toolsuite" from the MPLAB toolbar), c.) he path for CCSC.EXE is configured correctly for your installation of the CCS C Compiler (use "Project -> Set Language Tool Locations" on the MPLAB toolbar) and d.) verify you have the latest CCS MPLAB Plug-in installed.
- If you are still having problems with MPLAB®, try opening a DOS command prompt and invoking the compiler from the command-line to verify that the compiler is working properly. See the CCS manual for help on using the command line compiler.


